
Your cart is currently empty
To make the GST payment post-login to the GST Portal once the challan is generated, perform the following steps:
1. Go to the address https://www.gst.gov.in/. The Home page for GST is shown.
2. Use valid credentials to log in to the GST Portal.
3. Access the challan that was made. Use the command Services > Payments > Challan History.

4. Choose the link for the CPIN you want to pay for.
Note: If you don’t know the CPIN number, you can search for it by the date it was made by choosing the “Search By Date” option.

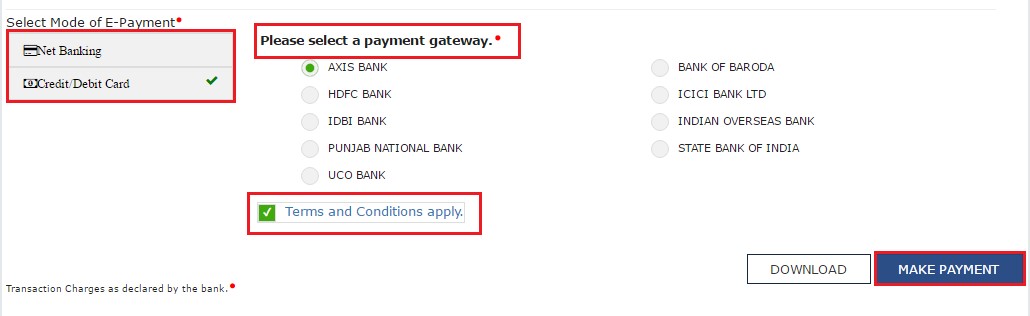
5. Select the Mode of E-Payment.
For payment through Net Banking
a. Select the Bank through which you want to make the payment.
b. Select the checkbox for Terms and Conditions apply.
c. Click the MAKE PAYMENT button.

For Payment through Credit/ Debit Cards
a. When it says “Please choose a payment gateway,” choose “payment gateway.”
b. Select the checkbox for Terms and Conditions apply.
c. Click the MAKE PAYMENT button.
Note: You will be taken to the page for Net Banking at the chosen bank. On the Bank’s website, the amount of the payment is shown. If you want to change the amount, cancel the transaction and make a new challan.
If the payment goes through, you will be sent to the GST Portal, where the status of the transaction will be shown. The receipt for the payment is shown.
• Click the View Receipt link to see the receipt.
• If you click the MAKE ANOTHER PAYMENT button, you can also make another payment.
• Click the “Click here to view your Cash Ledger” link to see the Electronic Cash Ledger.

In case of Over the Counter
a. In the Payment Modes option, select the Over the Counter as payment mode.
b.Choose the name of the bank where the cash or instrument will be put..
c. Choose Cash, Check, or Demand Draft for the type of instrument.
d. Click the GENERATE CHALLAN button.
e. Take a print out of the Challan and visit the selected Bank.
f. Pay using Cash/ Cheque/ Demand Draft within the Challan’s validity period.
g. Status of the payment will be updated on the GST Portal after confirmation from the Bank.
In case of NEFT/ RTGS
a. In the Payment Modes option, select the NEFT/RTGS as payment mode.
b. In the Remitting Bank drop-down list, select the name of the remitting bank.
c. Click the GENERATE CHALLAN button.
d. Take a print out of the Challan and visit the selected Bank. Mandate form will also be generated simultaneously.
e. You can pay with a check through your account at the chosen Bank or Branch. You can also pay by having money taken out of your account.
f. The bank will handle the transaction, and the RBI will confirm it within two hours. ank.
g. Once you get the Unique Transaction Number (UTR) on your registered e-mail or mobile number, you can link the UTR to the NEFT/RTGS CPIN on the GST Portal. Go to the Challan History page and click on the link for CPIN. Enter the UTR and link it to the NEFT/RTGS payment.
h. After the Bank confirms, the GST Portal will be updated with the status of the payment.
i. The payment will be changed in the Electronic Cash Ledger’s minor and major heads, depending on what it is.